Step 1: Install & Activate Elementor For WordPress
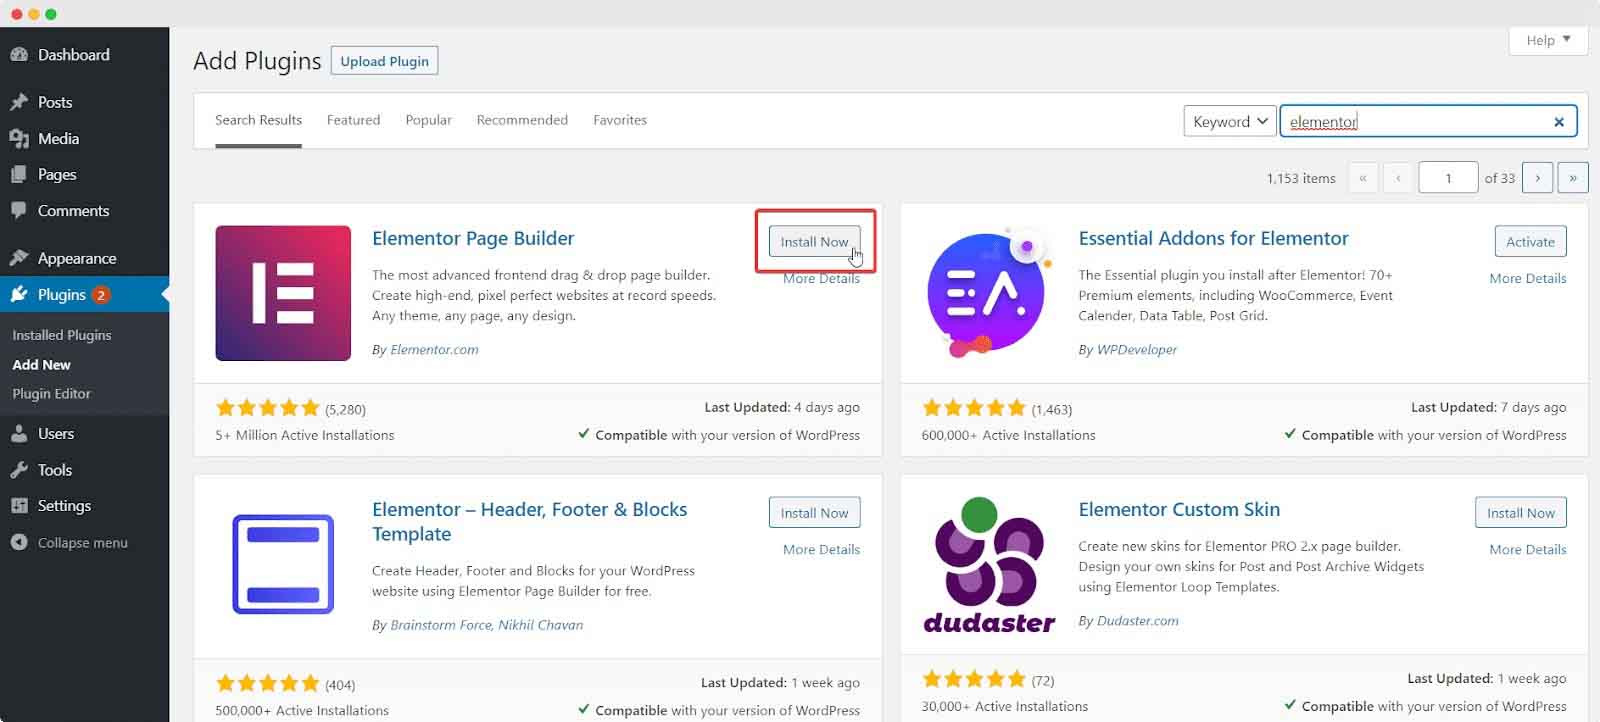
The first step is to install and activate Elementor from the WordPress Plugins database by searching for ‘Elementor’ in the search box.
Once you have located the plugin, just click on ‘Install Now’ and then ‘Activate’ to get started.
Step 2: Create A New Page With Elementor
Once you have installed Elementor, navigate to your WordPress dashboard and click on Pages→ Add Newto create your new website landing page.
At the very top of your new page you will see a blue button named ‘Edit With Elementor’. Click this button and you will be redirected to the Elementor Editor.
Step 3: Build Your Page With Elementor Editor
On successful completion of the above steps, should land the user to see the Elementor Editor Menu on the left hand side.
First thing to start with is to hit the red plus button and select structure for the page. From here you can start designing the page by dragging and dropping any widgets you like.
How To Use Elementor To Manually Design Your Page Structure
With the Elementor Editor, you have the flexibility to customize the entire layout, structure and appearance of
your website pages. All you have to do is adjust a few settings and watch the changes take place.
Step 1: Choose Your Page Layout In Elementor Editor
You can select the layout of your page from the Elementor Editor by clicking on the gear icon and then selecting any of the layout options from the ‘Page Layout’ drop down menu.
For this tutorial, I am using the ‘Elementor Canvas’ layout.
If you want to change the background color , or add a background image to the page, you can click on the ‘Style’ tab and play around with the settings under ‘Body Style’.
Step 2: Choose Layout Structure For Each Section
By clicking on the ‘ Red plus ’ icon above the ‘Drag widget here’ option you can choose the layout structure for each individual section.
This is especially useful if you want to add a lot of different elements together in one section, and gives more flexibility when it comes to designing the web page.
Step 3: Add Elements & Move Different Sections
Keep adding elements and moving sections until you are happy with the way the page looks. For each element you’ll see three tabs–Layout, Style and Advanced.
For every element, the settings under these tabs will be different, so play around with the options until satisfied with the appearance of the page.
Elementor global fonts and colours
Elementor’s global fonts and colors allow you to update your website’s fonts and colors from one convenient place.
This will make it easier for you instead of repeatedly opening parts of the pages and changing them individually.
Step 1: How to access Global Settings
Login to Elementor, select Edit with Elementor on the site you want to update.
In Settings select Site Settings and you can now access either Global Fonts or Global Colours.
Step 2: How to change Global Fonts and Colours
Click Global Fonts then go to the font labeled Primary (it’s listed under System Fonts). Select the Pencil iconand change attributes in the Typographymenu.
Click Global Colours and go to a font label called Primary (it’s listed under System Colors). Click the color swatch to open the Color Pickerand select the color you want.
How To Use Elementor Theme Builder
You can use the Elementor Theme Builder to quickly design essential features of your website such as
Header & Footer, different sections and pages and much more.
Step 1: Create A New Header In Elementor
First navigate to Templates–> Theme Builder from your WordPress dashboard. Click on ‘Add New’.
Afterwards, you have to select Header as your Template Type and give it a name.
Step 2: Customize Your Header In Elementor
You can choose to design your own header or you can pick any of the premade ones from Elementor Pro Template Library. After choosing a design that you like customize it however you want.
After your header is ready click ‘Publish’, if you want you can set conditions for where you want your header to be displayed. When you are done you should be able to see your header displayed on your page.
You can follow these same steps to create footers for you website too. Just make sure to choose ‘Footer’ as your Template Type when you are designing your footer using the Elementor Theme Builder.
Please note almost all of the images are GIF and all of them created by me.